Understanding the Basics of SNES Architecture
Exploring the Heart of the SNES System
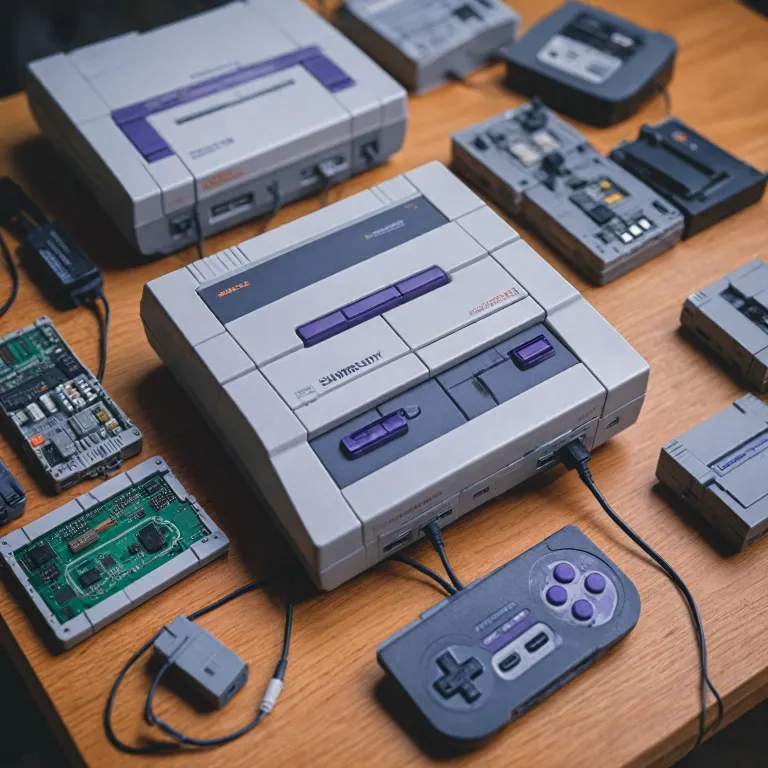
Diving into the architecture of the SNES, or Super Nintendo Entertainment System, is akin to unraveling the blueprint of an iconic era in retro gaming. Known for its 16-bit processor, the SNES was a powerhouse in its time, competing fiercely with other entertainment systems. Understanding its foundational elements is crucial before embarking on the journey of building your own retro console. The SNES architecture is built around the Ricoh 5A22 processor, the pulse of the console. It powers games with complex graphics and rich sound, which defined the 'feel' of SNES classic games. If you're familiar with modern single board computers like the Raspberry Pi, you’ll appreciate the simplicity and elegance of the SNES system's design. Moreover, understanding the SNES system's memory and sound chip configuration is vital. The console used a combination of onboard RAM and video RAM to manage data, crucial for running games effectively. The sound processing unit, developed by Sony, required precise synchronization and added to the console's 'super' appeal during the golden age of gaming. Button layouts and connectivity options were limited on the original SNES, confined to a few controller ports, but the console's architecture allowed for an innovative expansion. When considering enhancements in later sections, USB ports and other modern connections can be retrofitted into your custom console. Finally, power management in the SNES was straightforward yet efficient for its time. Replicating a similar configuration with contemporary power adapters ensures stable performance for your games. This step will be crucial as you gather and assemble the necessary components for your build. Before you proceed, if you require parts or replacements for your retro console endeavors, a resourceful guide is available to assist you in sourcing the correct components.Gathering the Necessary Components
Essential Components to Craft a SNES Console
To craft your very own retro console from scratch, it begins with gathering the right components. This step is critical, as each element plays a vital role in ensuring your SNES console not only functions but also delivers that authentic games feel reminiscent of the super nintendo era.
- Single Board Computer: A Raspberry Pi is a popular choice due to its versatility and size. It houses the operating system and runs SNES emulation software like RetroPie or Batocera.
- MicroSD Card: This acts as your console's hard drive. Aim for at least 32GB—enough to store the system and a variety of games.
- Power Adapter: A reliable USB power adapter is essential to provide your Raspberry Pi with sufficient power.
- Case: For aesthetics and protection, select a case. Some prefer a design that mimics the NES or Famicom, enhancing that feeling of retro gaming.
- SNES Controller: Consider an authentic controller with a super Nintendo style for the genuine experience. USB options exist for practicality.
- HDMI Cable: Necessary for connecting your creation to modern displays.
- Miscellaneous Parts:
- Pins for the GPIO to accommodate custom inputs or additional functionality
- A micro USB power cable
- USB Ports if you plan to connect multiple controllers
At this stage, if you're intrigued by functions like the button next to select on old Nintendo controllers, you might want to consider how these could be integrated into your console design for a truly personalized touch. The journey of crafting a SNES console from scratch is both challenging and rewarding, blending retro gaming nostalgia with modern DIY expertise. Once you've acquired these components, you're ready to delve into the next steps—transforming these pieces into a fully functional entertainment system.
Designing the Console's Circuitry
Mapping Out the SNES Circuit Design
Crafting your own SNES console involves understanding the intricacies of its circuitry. The first step is selecting appropriate components that align with the Super Nintendo's design. As you gather your materials, remember that a clear plan will ensure the final console functions smoothly. Here’s how you can map out your console’s circuit system.- Choosing a Single Board Computer: A Raspberry Pi is a popular choice for its compatibility with retro software like RetroPie and Batocera. The board's processing power will largely determine your console’s performance. Select a model that supports USB ports for controllers and has sufficient power to run SNES games effortlessly.
- Implementing Power Supply Solutions: A stable power source is critical. Utilize a micro USB power adapter that suits the board's requirements, ensuring consistent energy flow. This will prevent unexpected system shutdowns during intense gaming sessions.
- Connecting Peripherals: Carefully attach the SNES controller, via USB or tailored pins such as pin GPIO, to your board. Ensure the connections are secure to maintain the authentic games feel of the Super Nintendo.
- Integrating Display Output: Utilize an HDMI cable for the video output to connect the board to your display. This provides clear visuals, especially important for capturing the retro gaming vibe of SNES titles.
- Incorporating Storage: A microsd card is essential; it houses the operating system and the games. Ensure your chosen microsd has ample storage capacity to accommodate your favorite SNES games, offering a robust gaming library.
- Designing the Case: Last but not least, fit all these components into a custom or pre-made case reminiscent of the classic edition SNES console. This step not only protects the hardware but also enhances the aesthetics, providing a truly retro console experience.
Programming the SNES Software
Programming the Mind Behind Your SNES
Crafting your own Super Nintendo Entertainment System (SNES) involves more than just assembling physical components; it requires creating a harmonious blend of software to breathe life into your retro gaming console. This is where your programming prowess comes into play. Before diving into programming, ensure you have your Raspberry Pi ready and equipped as this single board computer will serve as the heart of your DIY SNES. Whether you're opting for a Retropie or Batocera setup, these Linux-based operating systems are tailored for retro console emulation and will make the process smoother.- Choosing the Right OS
- Retropie: Popular for its user-friendly interface and extensive game compatibility, Retropie is a preferred choice for many SNES fans.
- Batocera: Known for being lightweight and efficient with low-power consumption, Batocera can be an alternative for those seeking optimized performance.
- Setting Up the Environment
- Install your chosen operating system on a microsd card using an image flashing tool like Etcher.
- Connect your microsd card to the Raspberry Pi and make sure it’s securely placed.
- Configuring Your Retro Console
- Start with the ‘Raspi Config’ to ensure all settings align with your desired gaming experience.
- Connect peripherals such as the SNES controller through the USB ports and ensure proper mapping using the setup wizard.
- Incorporating Games
- The games feel is essential; therefore, it’s important to have your favorite titles ready. You can load ROMs legally acquired onto the microsd card.
- Maximizing the Experience
- Use a quality HDMI cable to connect your SNES classic edition to the display for crisp visuals.
- Consider a power adapter that fits the micro USB specifications to ensure consistent power supply.
- Exploring the Additional Features
- Customize your retro gaming setup with fan systems for better cooling and USB powered speakers for improved sound.
- Add a power button for convenient access, mirroring those found on NES classic and Super Famicom systems.
Assembling and Testing Your Console
Your SNES Revival: Bringing Everything Together
Once you’ve designed your console's circuitry and programmed its software, the excitement of seeing your SNES console come to life is just a step away. This assembly phase can be very rewarding, especially for retro gaming fans eager to revive the nostalgia associated with the classic Super Nintendo Entertainment System. To start, gather the components you have collected along this journey, such as the single board computer, perhaps a raspberry to run RetroPie or Batocera, the micro USB power adapter, and your meticulously crafted case. Ensuring accurate assembly is crucial. Begin by attaching the board securely within the case, using the pin GPIO for necessary connections. As you position the board, make sure that the USB ports are easily accessible for your SNES controller, offering that authentic games feel. Also, consider the placement of the HDMI cable for seamless video output. Before you secure everything in place, insert your pre-configured microSD card into the designated slot. This card holds the operating system and SNES software fundamental to your retro console. Double-check that your power adapter is compatible and firmly connected to ensure the system powers up without issues. Conduct a thorough test by connecting to your display and triggering the system's power. If everything is set up accurately, your SNES classic edition experience will boot up, bringing the retro console to life. You'll find joy in navigating the traditional layout reminiscent of the original super famicom or NES classic. As you bring your SNES to its final form, remember this isn’t just a build; it’s a bridge to repertoire – a journey back to a bit-driven era where games were not just played but cherished. Enjoy the nostalgic joy of your custom-built entertainment system!Enhancing Your SNES Experience
Maximizing Your Gameplay Experience
After piecing together and testing your SNES console, there's still room to enhance its functionality and truly maximize the retro gaming experience. Here are some steps to consider:- Upgrade with a Raspberry and RetroPie: Integrate a Raspberry single board computer with RetroPie to broaden your console’s capability. The Raspberry can support various emulators, expanding your game library beyond SNES to include other retro consoles like NES Classic and Super Famicom.
- Optimize Storage with a MicroSD Card: Using a high-capacity MicroSD card can store a larger collection of games and system files. This small step ensures you won't run out of space as you indulge in your favorite titles.
- Streamline Power Management: Employ a reliable power adapter compatible with Micro USB connections. Ensuring consistent power will protect your system and preserve your games feel during long gaming sessions.
- Improve Control with SNES Controllers: Authentic SNES controllers will enhance the overall experience by providing the original feel of the classic edition. Ensure they are connected properly using the board’s pin GPIO or USB ports if necessary.
- Enhance Connectivity via HDMI Cable: Utilizing an HDMI cable instead of traditional AV cables offers a clearer display and a more modern approach, bridging retro and contemporary entertainment systems.
- Customizing User Interface: It's worth customizing the RetroPie interface to organize your games and settings. By tinkering with raspi config, you’ll be able to create a smooth and personalized user experience.
- Stylize with a Custom Case: For a true super experience, house your console in a custom case that reflects your personality as a retro gaming enthusiast. It’s an ultimate step towards making your device not only functional but visually appealing.
